Pages

Monday, December 30, 2013

Little French Jacket : Update #7

Just a quick update on my Little French Jacket project...
I started trimming my seam allowances and readying the lining for a lapped fell stitched seam.


I started on one front seam and worked my way toward the back but I decided to make a change on my second seam (the side seam)... to press the lining seams open and slip stitch closed rather than lapped and fell-stitched. Claire Shaeffer goes over both methods in her book, but doesn't really elaborate on why one might be preferable over another. I decided to make the switch because my boucle and my lining are rather light and the triple layer of lining on the lapped seam was quite visible and I didn't like it. It looked a bit unbalanced. After doing two seams open I unpicked the first seam and redid it. The show through is much less and more balanced in appearance. 


The open seams are accomplished by first pinning the seams together and pressing (above, top) and then basting with a quick running stitch on each side. After basting I can then slip stitch without concern for shifting the layers of fabric (above, bottom). 

I've finished the first half of the jacket and I have the next seam trimmed and pinned. I hope to finish up with all the vertical seams over the New Year so I can move on to preparing the sleeves. 

If I have one resolution for 2014 it is to finish this jacket by my 1 year anniversary (and to finish my thank you notes and photo album). 

PS... I REALLY HATE the new Flicker photo sharing code. 

Friday, December 6, 2013

"Chanel-Inspired" French Cardigan Jacket: Part 6


I may have mentioned this earlier, but I started to quilt my french jacket pieces over a year ago when I first started the project. I tested out the quilting on some pieces of scrap fabric slightly smaller than a sheet of paper and didn’t use an obsessive amount of pins, just enough scattered around so that the silk and boucle wouldn’t shift or slide much. The walking foot do the work, and went slowly starting from the same end for each row. The results looked good so I went ahead and quilted all but the center front panels.

Then I put the jacket aside for the winter, spring, summer, fall (took a jacket making class) and last winter when I made my wedding dress.  That brings me (more or less) to the present and despite being in 2 classes this semester I have finally come back to the project and made several new muslins to check and refine the fit. I decided to go up one jacket size and worked on same fit issues that I had previously.

Muslin #1  - front not hanging straight

Muslin #2 - Neckline also overlaps at front
I don't have any pictures of the current V7975 muslins (#3, #4) but the problem is pretty much the same, the front is swinging away at the hem and the neckline overlaps at the top. The difference is that I now have a little bit more knowledge about jacket fitting. The first place one should address when dealing with this sort of fit problem is the shoulder seam. In order to get the front to hang straight (grain-lines are important in a muslin fitting!) one must correct the placement of the shoulder seam. In the case of this pattern, my shoulder seams are too far forward at the neck which is causing the problems.

To correct the problem on the new muslins (I did this for all three that I made) I only used pins at the seams (yes, I have tons of scratches on my arms... don't say I didn't warn you) and I was able to re pin the shoulder seams in increments until I was satisfied with the placement of the shoulder seam and the grain-line on the front of the jacket. It turned out that the front pieces were fine, but the back pieces were too long/high and the back neck of the muslin was creeping up my neck.

evidence of my erect back (muslin #1)
Now, I have a rather pronounced front (ahem) and a rather straight, erect back. I often have wrinkles across my back at the bra line because my front is longer than my back thanks to my assets. I have done some research and know that an "erect" back alteration is quite similar to a sway back alteration.
(My fix usually involves picking up the back about/at least a 1/2".  By "pick-up" I mean to actually lower the back neck and shoulders. (note: Pattern, Scissors, Cloth has a great tutorial) In the case of this jacket I could easily see that the same alteration would correct the back neck and shoulder seam line.

Muslin #3 - back correction
Further muslin refinements included a front FBA by letting out the front princess seams and replacing the bust curve. I also tried an even larger muslin (20) but the fit in the armholes and across back was too big so I went back to the size 18. The muslin adjustments were transferred back to my paper pattern and then I re-thread traced my pattern onto the already quilted pattern pieces. Thank Susan for those extra large seam margins! The difference was no more than 1/2" total so it should work out fine. For the moment I am leaving the original basting threads in.

The current state of the jacekt
I have also begun to machine baste the pieces together and I'm looking forward to matching and cutting out the sleeve pieces.

Thursday, December 5, 2013

Review: The Couture Cardigan Jacket by Claire B Shaeffer

I couldn't wait for black friday or christmas to buy Claire Shaeffer's latest book, Couture Sewing; The Couture Cardigan Jacket; Sewing secrets from a Chanel Collector, so I ordered it from Amazon while purchasing my hub's birthday present.

Recent Acquisitions
So... I've read almost everything there is to read on the subject (patterns, magazine articles, websites, blogs) so I knew that a lot of the information would be a little redundant. What I was hoping for was some further illumination on the process and of course the DVD that came with the book. 

I read the book in about 2 hours, maybe less. The print is large and there are a lot of pictures. That said, I don't feel that it is particularly light on content, however it feels more like an expanded construction for her Vogue 8804 pattern than a definitive book on the subject. The fabric choices and trim options shown in the book are rather uninspiring and there is no discussion of fitting the jacket or how a Chanel jacket should fit. She only mentions other patterns is in the DVD. Speaking of the DVD... all the step-by step pictures in the book are still images from the DVD, so the quality of the images is a little less than ideal, however the content of the images and the DVD is quite nice. I feel that the real value in this book is the DVD because there is just nothing like watching someone with years of sewing experience do the work. As Claire sews she is able to point out methods and details that an instructor might not think to mention after the fact. Overall, I'm glad I have this book/DVD, but it in no way replaces all of the other research one can and should do in preparation for their own Little French Jacket project.

Also, on black friday I was in the burbs visiting my in-laws and I managed to sweet talk my husband into taking me to Jo-Ann's and AC Moore. I was able to purchase a sleeve board with my black friday 50% off coupon and some clover fork pins, which I have decided are only marginally more useful than regular glass headed pins as they require a bit of attention to insert properly and WILL break your needle if you sew over them.

Wednesday, December 4, 2013

"Chanel" is not an adjective

I found this great video on Youtube. It is a talk by Cameron Silver given at USC Annenburg on the Chanel Jacket and the many commercial cardigan jackets it has inspired. It doesn't have many views yet but given the recent blog chatter about our Little French Jackets, I thought it might be something my fellow sew-alongers would enjoy.


My favorite snippets from the talk include these details:

  • Chanel created and made famous a formula that works; square cut, four pockets, silk lined.
  • The recognizable color palette; black, red, beige, white, navy blue, beige, and fabrics; jersey and tweed for the jackets.
  • Chanel supposedly said, "buttons have to have button holes, pockets be in the right place, useable. A sleeve isn't right if the arm doesn't lift easily.
  • The chain in the hem; a little "luxe cache",  "a little hidden luxury".

At the end there are 5 models with cardigan jackets, some Chanel, some inspired.

That bit about the sleeve needing to lift or it's not right has really been on my mind a lot throughout this project. I think part of the problem is that jacket armholes are often too low, which makes lifting them difficult. It's something Chanel was known to fuss over so I feel encouraged to do the same.

Tuesday, December 3, 2013

Details: How I Made My Wedding Dress

It has take me a LLOOOooooong time to get around to writing about the details of making my wedding dress. This post is not quite as detailed as I'd like (ahem) and ends rather abruptly but I'm a sewist, not a writer and this post is past due so get a drink and settle in, this is a long one with lots of photos & links.

So... exactly how did I go about making my wedding dress?
Lots of research and planning followed by lots of work!

Planning

Major Design References and inspiration:
The elements that I wanted most were lace and sleeves.  I was going for a traditional, vintage look so pouffy and strapless were out. Favorite designers were  Claire Pettibone, Temperly London, Jim Helm, Carolina Herrera (Twilight, Bella’s wedding dress), Kate Middleton (the lace bodice w/ sleeves), Dolce and Gabanna, and of course a million pins on pinterest. Rather than repost a bunch of inspiration pics, just go check out my pinterest board if you are so inclined. 


Patterns I considered
Vogue: V8766V1032
Butterick: B5731B5779
Kwik Sew: K3401
Simplicity: 1909

Musin Making
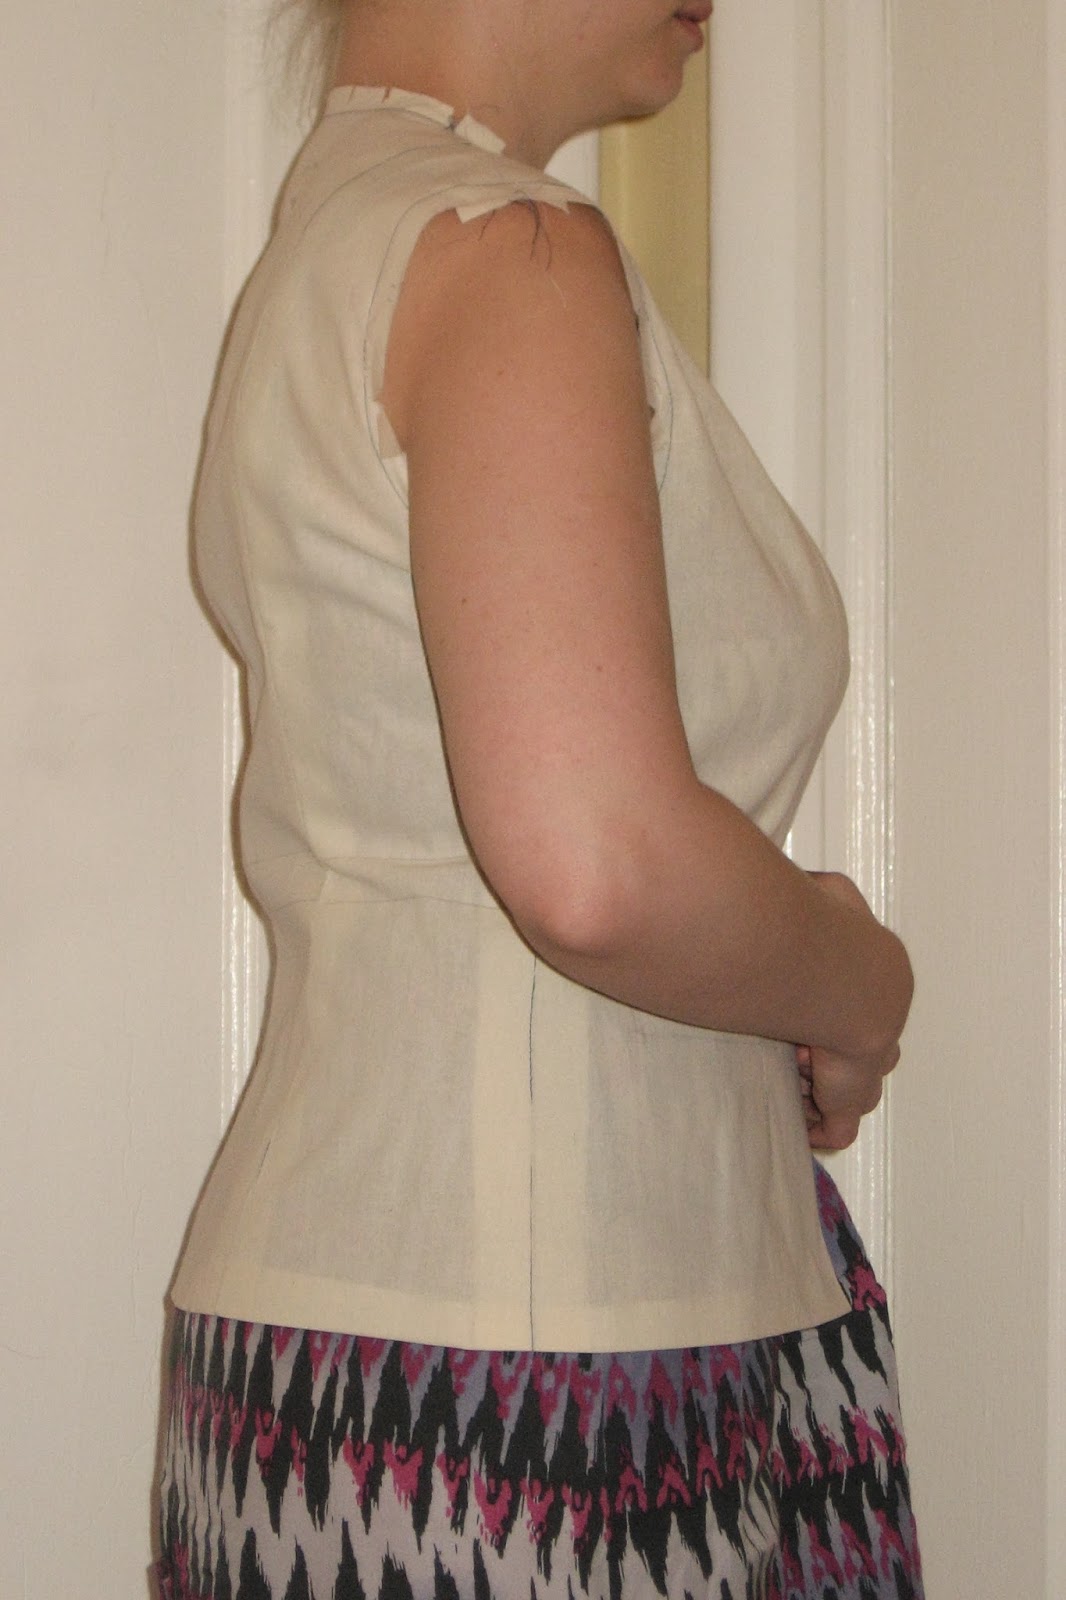
I started in December (6 months out) I made a bunch of muslins. Most of them were disappointing and would have required a lot of and Franken-fitting. Once I had settled on a pattern and made the muslin for it I was THRILLED with the look and fit. The minor corrections that I made for fit were: shift shoulder seam back ½”, raise armhole ½”, reduce each back seam 1”, and reduce each under-bodice side seam ½” at top; reduced the front neckline at the princess seams and increase front bodice princess seam length at empire seam (this adjusted the fit for my full bust). Then I made a second bodice muslin and replaced the first one. It fit fantastically (I wore it for over an hour because I was so excited). I had marked the shorter train length on the muslin and decided to go with it, but added 6” at the center back so that it would be a little longer. I had also made elbow length sleeves for the first muslin but decided to go with ¾” length sleeves for the final version.

Simplicity 1909,  the clear winner of the muslin stage.
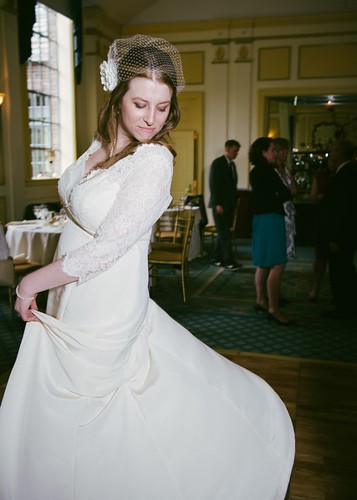
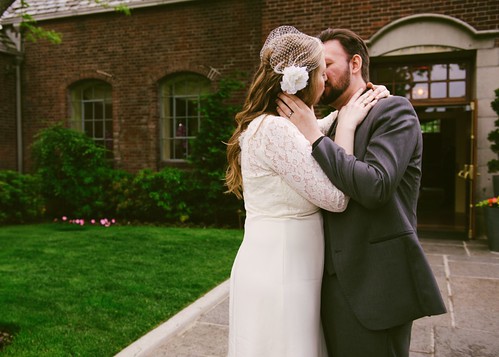
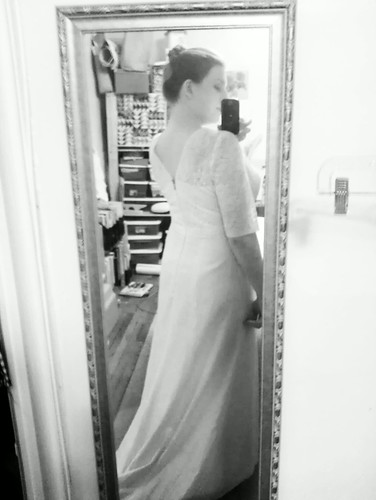
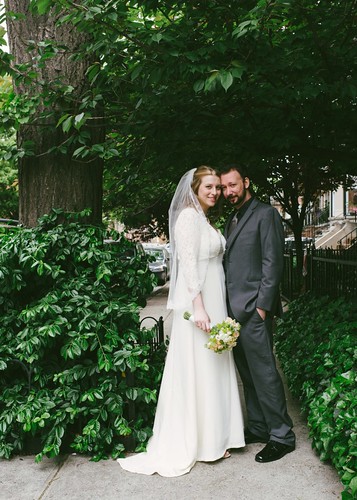
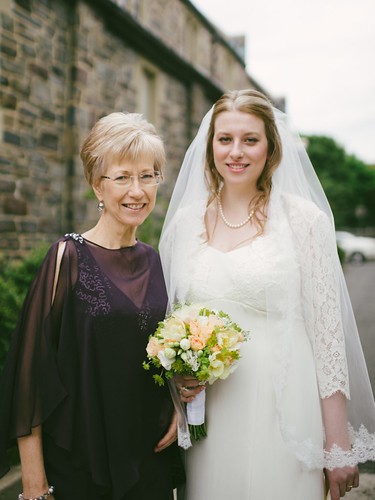
The Result

Materials

Fabric Shopping
Chic Fabrics – Silk Charmeuse lining, Cotton Batiste and Cotton Muslin.
My home away from home. 
Lace Star / Fabric & Fabrics - Silk crepe for the body, gorgeous alencon lace. This place has a fantastic selection.
This is the lace I chose. It was the single most expensive part of the dress. 
Mood Fabrics NYC – Silk Organza for underlining the bodice
Lennox Fine Fabrics - Silk Rayon Illusion Tulle (for the veil). 108” wide, 1.5 yards. I cut it down to 75” wide, which I think it may have been a little too wide.

Trim Shopping:
Top Trimming: Spiral Steal bones (which I didn’t use after all), clear comb, alligator clips, & french netting for the veil and fascinator.
Top Trimming - one of my new favorites
Pacific Trimmings: Gutterman thread, gold Riri Zipper with ivory cotton tape, gold hook & eye, silk pins, ribbons, etc.
Daytona Trim for Lace (for the Veil), and ribbon for the bustle.
I am so very in love with this lace and I've got like 9 yards extra!
MS Schmalberg for silk flowers, which I didn’t end up using, but wish I could have!
Pany Silk Flowers in the Flower District where I found the silk flower for my fascinator.
Manhattan Wardrobe Supply for a padded satin hanger and wedding dress garment bag.

Construction Research

My favorite sewing reference books
Books
Susan Khalje’s Couture Wedding Dress (not pictured) – I bought the CD, but I really didn’t like reading this as a digital book. The focus is on the specific construction employed in the example dresses (one of which I got to see at the Mood lace seminar). It isn’t exhaustive and doesn’t explain many alternate methods. It’s a good book, but I needed other references for my specific dress.
Reader’s Digest Complete Guide to Sewing – My old college standard and in my opinion, any edition of this book should be on every sewist's bookshelf. I also have the Complete Guide to to Needlework and I freaking LOVE it.
Vogue Sewing – this one is pretty good, but I usually look here to see if it differs from the Singer Sewing Book.
Couture Sewing Techniques by Claire Scheaffer, obviously.
Sewing Specialty Fabrics - Singer Sewing Reference Library - I collect this series; it's great!
Claire Shaeffer's Fabric Sewing Guide - this is a great reference for all construction options for specific types of fabric. I relied on it a lot.
Singer Sewing Book by Mary Brooks Picken – This is my favorite vintage sewing reference book. It also has a nifty logo that I think would make a great sewing themed tattoo.

Sewing Tattoo perhaps?
Classes
Craftsy: The Couture Dress (Susan Khalje) – excellent, I highly recommend it especially for the muslin making and the finishing touches.
Craftsy: Vintage Inspired Veils for the Modern Bride (Doreen Vandermeer). Pretty useful for the materials and techniques, but I had to go it alone for the lace application on my veil. I searched ALL FREAKING OVER for a flower that was nice enough to use on the fascinator but low end enough that it could be taken apart and reconstructed. Details on that in a future post (but no promises).
Mood Sewing Seminar: Lace (Susan Khalje) – I am SOOOO glad I was able to ask Susan some specific questions about choosing a lace and construction methods. She went over the specific types of lace and their applications. Susan also talked me into buying her book on CD and I got to chat with some of my favorite bloggers Daughterfish, Oonaballoona and Marina.
Susan Khalje at Mood
So with a muslin that made me happy, and avalanche of materials and reference sources I got to work making The Dress.

Construction Details

I cut out all my muslins, the silk crepe and the silk charmeuse on the large cutting tables at work. I used a bunch of cheap lightweight cotton muslin as a bottom layer to sandwich the silks between (muslin/silk/pattern) which helped prevent slipping and keep the fabric grain straight.
Serrated scissors, fabric weights and lots of space.
Cutting the charmuese lining
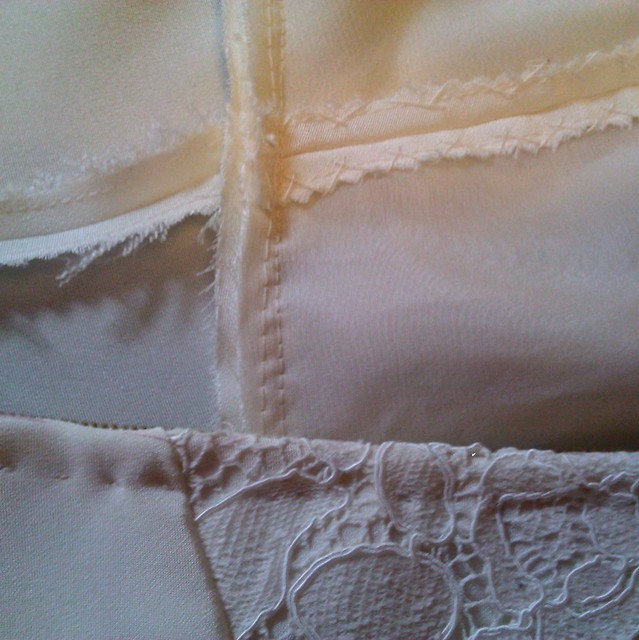
All seams were lock-stitched, pressed open and the allowances were stitched and pinked. I tested out french seams and also zig zag and pinked and the option I went with was the least bulky. I pressed all the seams with a silk organza press cloth, a clapper presser, and no steam.
The seam treatment on the right wins
I sewed and hemmed the skirt pieces before assembling them with the bodices.
I knew it was extremely unlikely that my skirt would be too long and I’d already made 2 muslins so I felt comfortable pre-hemming. This was also the way the pattern instructions were written so I think that a fitting is expected for this level of project. The lining hem is a ¼” double bend-back.  The body hem is machine blind-stitched using lace hem tape to reduce bulk.
Machine Blind Hem - not very couture, I know.
I originally wanted to do a hand rolled hem, but it would have taken too long (time management decision!) and my test looked rather thick. I am reasonably happy with the results, but it looked a little scary before I pressed it.
Pressed Blind Hem - with lace hem tape
The crepe under bodice is underlined with silk organza. I basted the underlining to the self with silk thread. I wish I had used two layers of organza, or purchased a heavy weight organza. Looking back I would have tested out different weights, but good silk organza is NOT cheap. I catch stitched the bodice seams open.
Silk Organza Bodice Underlining - glass head pins and serrated scissors
I further stabilized the (crepe) neckline edge with bias strips of silk organza that I steam pressed (learned this trick at the Mood lace seminar from Susan and Marina).

I cut the lace over bodice at home so that I could lay out the pattern pieces and ruminate on it for a while before committing to cutting.
The pattern layout diagram wasn't very descriptive.
Aligning the scallop valley with the shoulder seam-line.
I took 24 hours to place, fuss and decide on the placement of the pieces in a way that would make the best use of the scallop edges. Finally I worked up the nerve to cut my precious, expensive, french alencon lace.
I left myself plenty of margins for overlapping motifs

I then thread traced the pattern pieces with blue thread.
Working at night makes for crummy instagrams
My basting stitches were uneven (the front face had longer stitches) and I would advise against this because the seam line got sort of blurry while I was sewing it together. In hindsight, I would recommend about a ½” stitch length with even stitches on both sides of the lace.
Thread traced seam allowances and notches
Front bust dart & planned cut line
I used a combination of seam methods for the lace over bodice. The side seams and sleeve seams were lock-stitched, pressed open and catch stitched flat.
side seam allowances pressed open and catch stitched
The shoulder seams were lapped and hand appliquéd where the motifs allowed and lock-stitched, pressed open and catch-stitched were the motifs did not work. The armholes were lock-stitched and bound with pressed silk organza bias strips.
Armholes bound with bias silk organza 
The bust darts were lapped and appliquéd by hand with silk thread; that was by far my favorite part.
Dart test swatch with lime green catch stitches
At this point I stalled for a few precious days (less than 3 weeks to go!!!) because I wasn’t sure if I would need straps (as the pattern) or boning in the lining seams to help hold up the bodice. I decided to go with straps but this required some extra fitting to ensure the strap length was correct.

With time running out I made a list of all the last steps and got real busy crossing them off!

Before attaching the bodice lining to the skirt lining I inserted 1/8” wide satin ribbon at the side seams/empire seams for hanger loops. I tested the length out on the padded hanger that I bought for the dress. I wanted the loops to both hang around the hook of the hanger.

The lace over bodice to the crepe under bodice at the empire seam.
The bodice lining is attached to the bodice at the neckline edge. I machine lock stitched and under stitched the seam allowances toward the lining.

Once the self and the linings were assembled together I tacked the side seam allowances together (inside where no one can see) at the empire seam. This was to ensure that the hanger loops would be supporting the entire dress and not just the lining.

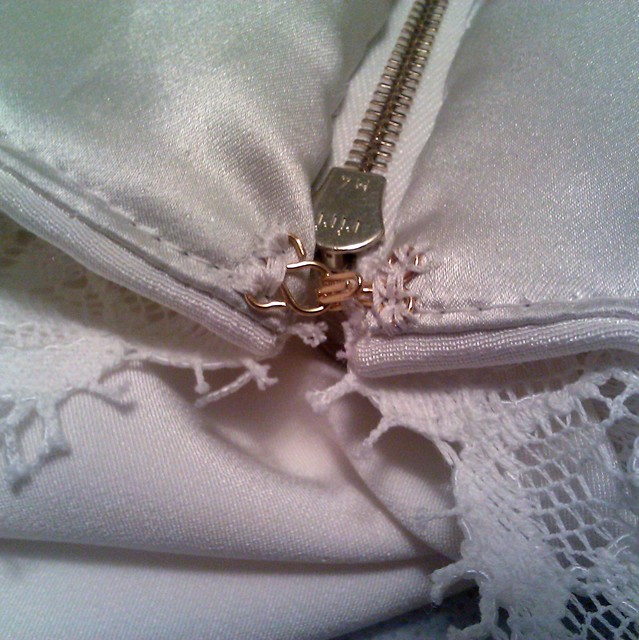
I hate installing zippers as a general rule, but sewing it by hand with the best materials was such a pleasure.
hand picked zipper application
Silk thread, hand picked zipper
My RiRi zipper has gold teeth and ivory cotton tape. I hand picked the zipper using silk thread doubled.
Here you can see the bodice seam allowances catch stitched to the organza underlining.
Then I fell stitched the charmuese lining to the zipper tape on the inside, and a gold hook and eye at the top finished the top edge. 
Charmuese lining is so lovely.
My Zipper is so pretty!
Gold hook and eye - my stitching is not so great though.
For finishing touches; I tacked the under-bodice to the lace over bodice at the side seams near the top of the under-bodice; I made thread chain stitch carriers for the straps at the front empire seam and at the shoulder seam to ensure that the straps wouldn’t peak out from the lace. This also helped prevent the lace from slipping off my shoulders.
Thread loops at the shoulder seam to hold the straps
One final fitting (thanks Sara!) to decide on the bustle points and I then took 18 hours to decide between buttons or hooks; at the last minute I went with ribbons instead because I decided I didn’t want anything visible on the outside and I also saw a great tutorial on You Tube on how to use them.
Hook or button? How about neither?!

The fascinator and veil were the very last things that I did (day before the wedding). I worked on the fascinator on the afternoon before the rehearsal and I made the entire veil, from start to finish between 10 and 12 pm after the rehearsal dinner.  I may blog about them eventually, but I posted about those projects on my craftsy page so you can check it out there for now.

And that is the end of this post for now. I may edit to add more photos or additional details later.
Let me know if you have questions!

Monday, October 28, 2013

"Chanel-inspired" French Jacket Revisited (Part 5) - Sleeve Pattern Woes

Soooooo.... Busy busy busy here, but obsessing again about my "Chanel" French Jacket project that has recently come out of hibernation. I figure if I can make a wedding dress there is no reason I can't finish this jacket.

Just to recap, I am using Vogue pattern V7975. I have recently decided to make a new muslin because it's been a while since I started the project and I still have some lingering doubts about the fit and size. So far I have only cut out and quilted the individual body pieces.  Having cut a large 2" margin around my pieces I have plenty of wiggle room to adjust for fit and size. 

One reason why I pressed pause on this project was because I wasn’t sure what I wanted to do about the sleeves as the pattern is a two piece and the classic french jacket is known for that 3 piece. I am not satisfied with the prospect of simply splitting the tops sleeve as this will not create the nicely balanced 3 piece pattern that I have seen on other blogs taken from another OOP pattern. It also wouldn’t look like the sleeve diagram proffered by Claire Schaeffer in her Couture Sewing book. I tried substituting the sleeve from Claire Schaeffer’s recent vogue pattern but it is not a good match. I’m waiting with anticipation for Susan Khalje’s new pattern/book and I plan to acquire Claire Schaeffer’s new book soon as well. I would really like to get the question of 2 piece vs 3 piece settled soon!

Another reason my jacket project skidded to a halt (other than The Dress project and my sleeve indecision) was because last fall I took a jacket and coat pattern drafting course at FIT and I think my brain exploded a little. I realized that substituting sleeves was not a wise choice without a little know-how and I knew my jacket project need to hang out while I processed my new knowledge. In class, I learned that sleeves are best drafted to fit the jacket body. The shape of the base of the armhole must match the shape of the base of the armscye and the proportion of the armscye is essential to creating a beautiful sleeve cap. If it doesn’t, there will most certainly be drag lines. Additionally, the amount of ease in the sleeve seams needs to be precise so that the sleeve will tilt forward and turn inward without any drag lines or collapsing. Drafting a good sleeve is a special skill, to say the very least.

This brings me back the V7975. The sleeve that comes with this pattern has a few identifiable problems. It is quite possible that most people haven’t run into any issues because they are ignoring the cutting lines altogether and carefully fitting and hand sewing their sleeves with excess seam allowance, or perhaps replacing it with a coincidentally better drafted sleeve. However, it’s been bugging me that there is no documentation about this online, so I felt the need to point it out incase anyone else takes issue with the sleeve pattern or doesn’t go the full couture method.
Vogue 7975 - via voguepatterns.com
Problem #1: The front seam doesn’t have a step. Both seams should have that step because it is the step and not the tiny dots that allow the sewer to correctly line up the seams. This may not be a problem for the couture enthusiast who is ignoring the cutting lines in favor of hand basting the sleeve carefully, but it aggravates me on a technical level.... production patterns have steps on both seams!
V7975 front sleeve seam - no step!
Problem #2:  If the front seam did have a step, the top sleeve would definitely twist and have drag lines at the back seam because the top sleeve step in the back seam doesn’t match the under-sleeve. If you match the steps (edit: and the tiny dots) and sew from the top down your sleeve is going to look like crap. Promise. Try walking the back sleeve seam up starting from the top notches and you will see what I mean. I believe that the double notches and the under-sleeve step are correct, and the step (edit: and the tiny dots) on the top sleeve should be raised to match. This will correct the wonky balance.
V7975 - Corrected size 18 back sleeve seam step
Problem #3: The underarm shape of the sleeve doesn’t match the armhole of the jacket. The back portion of the sleeve is higher than the armhole (if anything, the sleeve should peel away from the armhole, not jut up into it) and this will create drag lines on the under-sleeve.  I briefly talked about this concept on flickr in the Colette patterns forum when I noticed a funny spot in the Laurel sleeve/dress pattern.) It’s easy to fix though. I just layered my pieces on top of each other and retraced the armhole onto the under-sleeve.

V7975 - Pencil traced the armhole onto the under sleeve

So there you have my thoughts on the V7975 sleeve draft. Moving on…

I recently acquired McCalls 6401 (OOP, but check Ebay!) which has a D cup front. 
It’s a short jacket (20” long) but can easily be lengthened in the across front/back, waist and at the hem. I traced out the size 18 onto plain white paper and added 1” length in the waist & 3/4" length in the sleeve for muslin making purposes.
I also checked the sleeve for any step errors, and I am happy to say that the front and back steps are both correct.
M6401 - Perfectly matching notches and back step
I haven’t checked the shape of the underarm, but I will get to that and if there is anything to report, I will update this post. EDIT: The muslin for M6401 did not look as good as my latest V7975 muslin, so I'm sticking with Vogue.

So yeah, that's where I'm at right now with the French Jacket project.

Sunday, August 11, 2013

10 Things to Know About Making My Own Wedding Dress (WITH PHOTOS!)

Recently I got married. What that really mean is, I recently had an excuse to make an epic dress for myself. YES,  I MADE MY OWN WEDDING DRESS!  And here are 10 things you might like to know about it.... 


1) Shopping for and trying on RTW gowns was a good idea.

Along with my sister and my MIL, I brought two level headed friends who know me and my personal style well. I tried on 5 dresses at Kleinfelds with the help of their wonderful sales associates and was able to determine which silhouettes looked best on me and I got an idea of what dresses in my “budget” looked like. (The “budget” was 6 times what I planned to spend on materials) This helped keep things in perspective later as I decided on a pattern and purchased materials.

2) I couldn’t commit to making my dress and going to the gym every day.

I decided that having a dress that fits me perfectly was a more reasonable goal than trying to lose 15 lbs and squeeze my chest into a ready made gown. I wish I’d realized this sooner because I would have started making the muslins a lot sooner as well!

3) The design process took a lot longer than expected.

I had a lot of design inspiration and a stack of commercial patterns to choose from. I knew that I wanted a slim skirt with a puddle train, long or ¾ length sleeves and as much lace as I could afford (not much). Originally I thought would combine design details from several patterns but the early muslins where not encouraging. After making muslins for 3 different patterns I was getting a little nervous because I didn’t know what my dress would actually look like. Then at what seemed like the last minute I found a new dress pattern by Simplicity (1909) that pretty much nailed my requirements and I wouldn’t have to change the design at all. I paid full price for the pattern and got right to work cutting a muslin with substitute lace and everything.

4) It helped to have a sewing-savvy friend to be a technical consultant.

My friend Sara is a recent Parsons grad and a knitting buddy. She comes over weekly for TV and wine so she was the perfect person to help me with the fine tuning of the pattern fit and to go with me to try on commercial dresses. She knew precisely what I was going for in style and fit and she knows quite a bit about sewing. It was immensely helpful to have her check in and see the dress progress on a near weekly basis. My coworker Julisa was also able to provide similar advice when needed. I work in the fashion industry as a technical designer and I did most of my pattern corrections and all of my fabric cutting at work on the large cutting tables. Julisa was often there to confirm my layout and cutting methods as well as help fit some of my first muslins.

5) I kept is simple (as much as possible).

I wisely picked a design that would not be a too complicated. It was a fitted but not overly structured design well within my experience level. I think the pattern choice was perfect. I researched couture sewing methods, but I wasn’t afraid to take make time saving choices about construction. There was one point when I started to make it into more of science project than necessary…While shopping for organza at Mood I ran into a coworker who was a contestant in Project Runway Season 10 and specializes in evening gowns. I told him about my plans briefly and asked him if he had any advice. He said something along the lines of “The foundation is everything! Use sew-through boning on your foundation!” Well, a corselet was not an original part of the pattern design, but Susan Khalje and half the wedding dress sewing blog-averse made them so I went ahead and purchased sturdy cotton muslin and all the boning and hook/eye tape I would need, but in the end I didn’t love the restricting fit and it was causing a bit of construction order confusion. Another friend asked if a corselet was truly necessary and wisely suggested that I leave it out in favor of good foundation garments. I took her advice and it got me back on track.

6) DIY Accountability.

While I was working on the actual sewing, I instagrammed pictures on my cell-phone and posted them on Twitter (@restlessgrace) and Facebook. This prevented a lot of repetitive stressful questions about progress and it also garnered a lot of positive feedback and encouragement from friends and family. One of my twitter friends (@FleurHoare) regularly re-tweeted my posts which gave me a boost of confidence and pride. My coordinator Shanelle checked in with me periodically to monitor my wedding planning progress. I could tell she was a little concerned that I was making my own dress, but she was fully supportive and kept me focused on all the wedding details.

7) Making the dress was stressful.

For the last 3 months I almost couldn’t think about anything other than the dress. It was the last thing I though about at night and the first thing I thought about when I woke up. Every wedding nightmare that I had was about the dress not being finished or looking like a hot mess. That it was stressful isn’t really a surprise, but it was something I was in denial about the entire time. I kept a tight grip on my confidence and miraculously I never faltered. I did secretly worry that it would be completed mere hours before the wedding and that it would be a wretched train wreck, but I think having perfected muslin that I could try on anytime that I felt my confidence flag was my saving grace.


I love this muslin!

8) Timing is super important.

I thought that my 10 weeks estimate was a generous amount of time in which to complete it, but I gave myself 14 weeks just to be safe. I finished the dress just 7 days before my wedding! I should have been more disciplined about sticking to my dress making schedule (see above: stress), but since I gave myself a few weeks extra I made it in just under the wire.

9) I saved money making my dress.

Having control of my materials meant I could have a gown in whatever price range I was comfortable with. I kept a spread sheet of my purchases to keep an eye on the mounting cost of the dress. I’m going to be open; I bought $757 worth of materials (including the veil and fascinator materials), but the materials that I actually used in the dress totaled $449. Bottom line; I made a gorgeous silk dress that fits me perfectly for the bargain price of $608 (factoring all dress materials purchased) and a beautiful veil and fascinator that cost $148. For comparison, all the dresses that I tried on were in the $1600~$4000 range (before fitting). There are a lot of materials left over that I definitely will use as well. With the extra silk and lace I plan to make some luxurious lingerie.

10) It was all totally worth it.

Making The Dress was the most satisfying part of planning my wedding. The day of the wedding went by in a fast blur, but I will remember making the dress for a very long time.

Going to Church
My mom looked so lovely.
We memorized our vows!
Borrowed my BF's pearl necklace
3 bustle points - ribbons inside

less structure = more dancing!

Love

Bonus Fancy Dress Making Tips: 

1. Practice everything, even if you’ve done it before. You want to know what the results will be like this time before you commit to each process.

2. Material is precious and expensive; protect your investment: Do not let anyone else touch your fabric/project. No one knows the financial and emotional investment better than you and no one will take as much care with your fabric as you. Clean your sewing room and don’t bring the dress outside the room!

3. You risk marring your fabric with excessive handling. When using silk crepe, test press a square of your silk with dry heat to see if it shrinks. If it doesn’t, consider skipping a pre press.

4. Press well and often. This is no time to skimp. Cover your ironing board with clean muslin. Better yet, also cover the ironing board legs with clean muslin. If your organza press cloth somehow got fusible glue on it from a previous project, don’t use it! Test the heat setting so that you don’t get seam impressions.

5. Sewing hook and eye tape is easy! There is a great tutorial here.

6. Just because Susan Khalje does it in her couture wedding dress book doesn’t mean you have to. In other words, a corselet is not necessary if the dress is not strapless and doesn’t have a heavy skirt.

7. Stay organized. Keep all your notions together, eliminate extra stuff on your sewing table, and keep all the muslins together and all the pattern pieces together. I spent an hour hunting for my modified pattern pieces one night, terrified that I’d thrown them out.

Extra: My wedding pinterest board with all my wedding inspiration pins.

Stay tuned for the epic wedding dress making detail post!


Related Posts Plugin for WordPress, Blogger...